
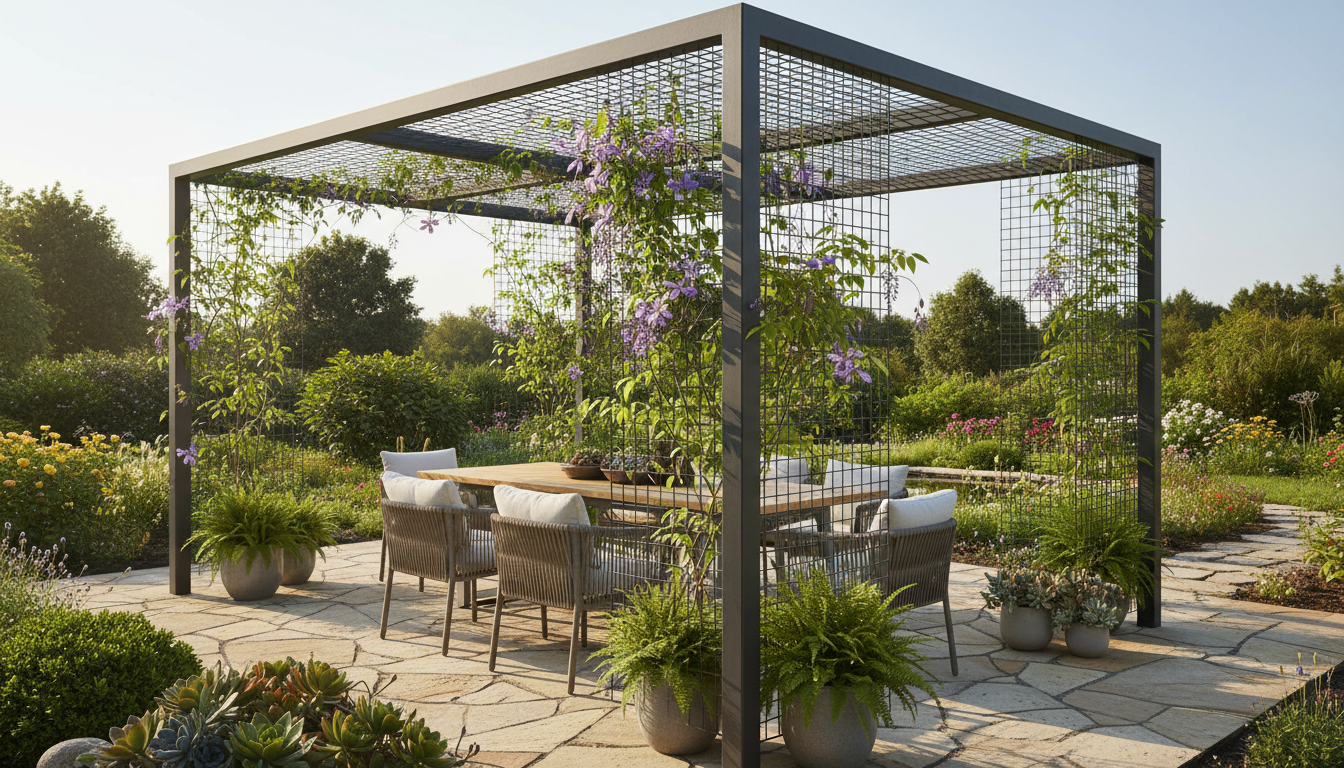
Are you looking for a lightweight structure to dress up your patio or create a shaded spot in the garden? Forget overpriced treated timber or custom-made aluminium: building a pergola with rigid mesh panels is an economical and surprisingly effective solution. With a few panels, sturdy posts and a bit of method, you get a durable structure ready to support climbing plants. Here is how to go about it.
Why use rigid mesh panels for a pergola?
A rigid mesh panel is not just for fencing. Its welded steel-wire structure, with regular mesh and natural rigidity, makes it an excellent support for a green roof. A wooden trellis eventually rots. Flexible mesh sags as soon as the plants gain weight. A rigid panel, on the other hand, keeps its shape over time with no special maintenance.
The other advantage is the price. A galvanised or PVC-coated panel costs significantly less than a traditional pergola structure. And if you have already fenced your property, you may have unused panels left over—so you might as well use them. The anti-corrosion treatment (galvanising + PVC coating) ensures several decades of outdoor durability.
What materials to plan for
Before you start, gather everything you need:
- Rigid mesh panels (height 1.03 m or 1.53 m depending on the desired effect, standard length 2.50 m) for the pergola roof
- Steel posts (square or round, height 2 m to 2.50 m) to set in the ground or fix on base plates
- Fixing collars or clamps suited to the post diameter, to hold the panels horizontally
- Concrete for setting, spirit level, string line, stainless-steel fixings
The number of panels depends on the area to cover. For a 5 m x 2.50 m pergola, plan on two panels laid side by side across the width, supported by at least six posts (three on each side).
How to install the posts
This is the most important part of the job. If the posts are poorly anchored, the whole structure becomes unstable. Start by marking out the exact footprint of your pergola on the ground using a string line. Space the posts no more than 2.50 m apart—the length of a panel—so that each end rests on a support.
Dig holes 40 x 40 cm and at least 50 cm deep. Set each post perfectly vertical (check with a spirit level on two faces), then pour the concrete. Let it cure for at least 48 hours before fixing anything to it. If your pergola is attached to a wall, you can fix a row of posts against the façade with wall base plates, which simplifies assembly.
Fixing the rigid panels as the roof
Once the posts are firmly set in the concrete, lay the rigid mesh panels horizontally on top of the posts to form the roof. Use fixing collars like those used for fencing, but oriented to hold the panel flat. Two collars per post are sufficient.
If you want to create a slight slope—for a more natural look and to help rainwater run off once the plants are established—simply set the posts on the wall side a little higher than those on the garden side. A 15 to 20 cm drop over 2.50 m of depth is enough. Tighten each collar firmly with a spanner and check the stability of the whole structure before moving on.
Which climbing plants to choose
The mesh of rigid panels (generally 200 x 55 mm) allows the stems and tendrils of climbing plants to latch on naturally. Among the most suitable species:
- Star jasmine, for its fragrance and evergreen foliage
- Wisteria, for its spectacular flowering (note: it becomes heavy over the years)
- Hops, for fast coverage
- Virginia creeper, for a dense effect and beautiful autumn colours
Plant at the base of each post and guide the first stems towards the panel with soft ties. In one to two seasons, the vegetation covers the mesh and creates pleasant natural shade. The mesh disappears completely under the foliage.
Maintenance and durability
Galvanised and PVC-coated rigid mesh does not rust, does not warp and requires no treatment. That is the major advantage over wood. The only maintenance concerns the plants: an annual prune to control growth and prevent the weight from becoming excessive.
Once a year, check that the collars are still tight, especially after the first winter storms. If you notice sagging in the middle of a panel under the weight of the vegetation, add an intermediate post or a metal crossbar as reinforcement. With rigid mesh made from 4 or 5 mm wire, the allowable load is more than sufficient for most common climbing plants.
Where to find the right panels
Not all rigid mesh panels are created equal. For pergola use, choose panels with at least 5 mm wire, with hot-dip galvanising + PVC coating to withstand UV and bad weather over the long term. At Districlos, you will find rigid panels, posts and fixing accessories available in stock, for in-store collection throughout France or home delivery. Their customer service team can also help you size your project if you are unsure about quantities.

Expert in fencing, gates, and outdoor landscaping since 2019.
Holds a Master’s degree in Digital Marketing – SEO, UX/UI.
View LinkedIn profile


